
This post contains affiliate links. If you purchase any products via links from this blog post, I will earn a small commission at no extra cost to you. For more information, you can visit my privacy policy here.

If you know me already, then you’ll know that I’ve always loved baking. As a child I saw my family bake these wonderful things, and I was always envious of how they could make something so delicious from scratch. When I moved in with my boyfriend from my mum’s house, I started baking even more – cookies, cakes, brownies.. you name it.
After about 6 months of living with my boyfriend, he recommended that I took an allergy test because I was always feeling a bit rubbish and I’ve had eczema for most of my life. When the results came back, I found out that I was allergic to quite a few products! But the main one I was so gutted about was milk. I have such a sweet tooth, and I thought that I would never be able to bake or consume these delicious treats again.
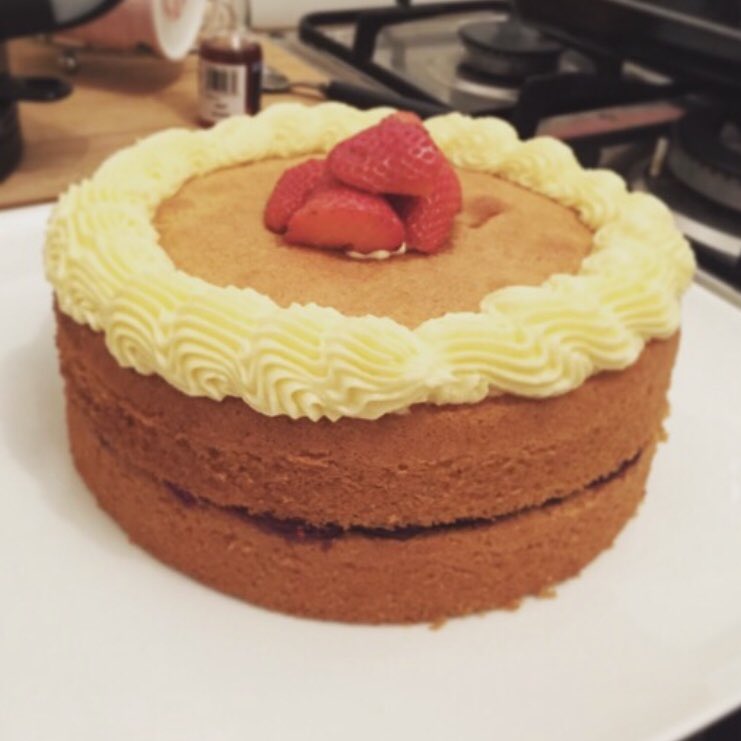
This was almost a year ago now, and I am enjoying dairy free baking more than ever! I came across this Victoria sponge recipe a while back now, but I’ve made it so many times that I’ve adapted it to just the perfect, dairy free balance.
This Victoria Sponge recipe is super easy to make and beautifully light
Ingredients
| Sponge | Icing | |
| 190g Dairy Free Butter (or stork) | 80g Dairy Free Butter (or stork) | |
| 200g Caster Sugar | 160g Icing Sugar | |
| 190g Self Raising Flour | 175g Jam | |
| 1 Teaspoon Baking Powder | Strawberries (optional) | |
| 4 eggs | Splash of Vanilla (also optional) |
Method
| 1. Preheat oven to 190c or 170c fan assisted. |
| 2. Making sure your dairy free butter/ stork is not too firm, (I sometimes microwave for 5-10 seconds to make it easier) cream with your caster sugar. Ensure this is thoroughly mixed until fluffy and light. |
| 3. Add your eggs one by one. By this, I mean add one egg, then fully mix, then add another, fully mix, and so on. I’m no chef but it makes it all fluffy and yummy. |
| 4. Add your flour and baking powder and fold in to the mixture. Do not be too rough with this part, as it can easily be overmixed. |
| 5. Pour the mixture half and half into two 8″ cake tins. It is often recommended to butter them to prevent sticking, but I use these fab cake tin liners which you can buy here. (I just hate it when you have to grease tins and you get butter all over your hands, ugh) |
| 6. Bake for around 20 mins. Sometimes I will check around the 15 minute mark and they’re already perfect. They just be ‘springy’ to touch, and your knife should come out clean when inserted. |
| 7. Whilst your sponge is cooling, you can prepare the icing. Whisk together the sugar and your choice of butter. You can add your vanilla essence now if you’re using it. It should be smooth without any lumps of sugar. |
| 8. I then place my buttercream in the fridge. You can skip this step if you like, but I find it much easier to apply/pipe when it’s cold as it keeps its shape a lot more and just behaves itself. |
| 9. Once your cake is completely cool, you can add your jam. Use all 170g and spread an even layer over the top of one of the sponges. Be careful not to spread the jam all the way to the edges, as when the weight of the sponge on top is added, the jam will spread a little more and will dribble over the edge. (unless this is the desired look, as it can be quite effective!) You can then sandwich the two sponges together. |
| 10. To finish, add a nozzle into a piping bag and cut the end. You can add your now cold buttercream into it – I usually add it with the bag in a mug so it doesn’t go everywhere (been there, got the t-shirt). Pipe your design on top of the cake, I usually do a pretty border. If you’re using strawberries, I add a little ‘splodge’ of buttercream in the middle as a base to stop them sliding everywhere. |
| 11. Cut a slice that is too big to be acceptable and eat really quick. No one saw. Yum!! |
I hope you enjoyed this recipe, if you made it let me know how it turned out!
Kerri x

Lifestyle Blogger based in Devon.
I like to write, drink tea and read great books.
PR – admin@diagonalstripes.co.uk

